Sunday, May 6, 2012

Different sprays


craftycountrymomma


is where i got this she has great ideas


Bug Spray Concentrate

•3 unpeeled garlic heads (yes, that’s heads not cloves)

•3 oz liquid paraffin found in craft and/or hardware stores

•1 tablespoon grated oil based soap (Ivory Snow ® is good)

•2 cups hot water

Crush the garlic heads and add to the paraffin in a small bowl and let stand for 24 hours. Melt the soap in hot water (do this in a pan or bowl that you will never use for cooking as the residue will stay with the pan and make everything taste like soap). Allow this mixture to cool and add to the garlic mixture. Mix well and strain into a glass jar. Store this mixture in the refrigerator. When ready to use dilute 4 tablespoons of the concentrate in 4 pints of water. Spray every two weeks or after a heavy rain. The concentrate will last in the refrigerator about 4 to 5 weeks.


The next spray will deter and kill whiteflies, mites, aphids and scale.


Murphy's Spray

•¼ c Murphy’s Oil Soap ®

•1 gallon water

Combine in a large container and transfer into a spray bottle to spray both the top and bottom of leaves and stems, but make sure you do this when the sun is not shining brightly or the leaves will burn (the soap attracts the sun’s rays). A good time to do this is on an overcast day or during dusk. Apply weekly or after a heavy rain while the infestation continues. You can store what you don’t use in a dark, dry area.


The following will get rid of slugs and snails in your garden.


Slug and Snail Remedy

Place crushed egg shells or construction sand around the base of plants that are being nibbled on by slugs or snails. They don’t like the abrasiveness of these materials and won’t go near the plants. Remember to replace the sand after a heavy rain.


This spray will control fungal diseases:


Homemade Fungicide

•2 tablespoons baking soda

•1 quart of water

Combine and pour into a spray container. Spray affected areas every few days until the problem is gone.


Insects will attack sick plants. Therefore, any plant that is affected with a fungal disease is prime game for insects. This next solution will control fungal diseases and deter insects:


Combination Insect Repellant and Fungicide

•1 Tablespoon cooking oil

•2 Tablespoons baking soda

•2 drops liquid Ivory Soap ®

•1 quart water

Combine and pour into a spray container. Apply every few days until the problem is gone.


Your family might think you’re making a salad but instead you are scaring deer and other animals out of your garden.


Red Pepper Spray

•1 unpeeled onion

•1 unpeeled head of garlic

•1 tablespoon cayenne pepper

•3 pints of water

Chop the onion and garlic and combine all ingredients in a saucepan. Simmer for 20 minutes. This should give your kitchen an eye-watering scent (have tissues ready). Cool and strain into mason jars which can be kept in the refrigerator for about 6 weeks. To use dilute 1 tablespoon of this concentrate with 1 pint of water. You might want to add 1 teaspoon of Ivory Snow and spray every week or after a heavy rain.


Give these natural garden remedies a try before reaching for the chemicals. They just might work and won’t harm birds, bees, and other creatures that live in your yard and garden that you want to have around.


Read more at Suite101: Is Your Garden Really Green?: How to Make Your Own Garden Pest Sprays http://organicgardens.suite101.com/article.cfm/is_your_garden_really_green#ixzz0pC4tpTvs


Make Homemade Organic Garden Pesticide

Brew Natural Pest Control Products for Flower and Vegetable Plants

Share Article
Mar 9, 2009 Jamie McIntosh


Natural pesticides are cheap and easy to make for the organic garden. Supplement your gardening supplies with these homemade pest controls.


Since organic gardening has changed from a novelty to a commonplace way to grow ornamental and edible plants, manufacturers have responded to gardeners’ demands for effective but natural pest control products. These organic garden remedies are no longer exclusive to specialty nurseries and mail order catalogs; instead, one can purchase a range of nontoxic garden supplies at neighborhood discount or home improvement stores.


However, some organic lawn and garden treatments come with a premium price tag. Furthermore, the DIY organic gardener appreciates tweaking homemade garden remedies for recalcitrant pests that seem immune to the ready-to-use products sold on shelves. Gardeners can turn to their pantries, gardens, and even the pests themselves to create potent plant remedies and cures for pennies.


Homemade Insect Soap

Insect soaps are available in any organic gardening aisle, but gardeners can make a homemade garden spray that’s just as effective for aphids, caterpillars, and mites. Combine three drops of mild dishwashing liquid in one quart of water. An added tablespoon of cooking oil helps the mixture cling to leaves. Spray plants to the point of drenching, but don’t use on blossoms or when temperatures are over 80 degrees F to prevent scorching the plants.


Homemade Tobacco Bug Spray

Everyone is familiar with the negative health effects of cigarettes, but the nicotine in tobacco is poisonous to all kinds of insects as well. Gather enough cigarette butts to harvest ¼ cup of tobacco leaves. Place these in a sock, and soak them in a quart of water overnight. Avoid using this homemade insect spray on eggplant and tomato plants, as tobacco can harbor the mosaic virus.


Hot Pepper Bug Repellent

Even for gardeners without a penchant for spicy foods, it’s worth adding a row of hot chili pepper plants to the garden for their bug repelling effects. Place a handful of dried hot peppers in the food processor, seeds and all, and grind to dust. Take care not to get the dust on the skin or eyes. Sprinkle around garden plants to repel ants and onion maggots.


Rubbing Alcohol Bug Spray

Rubbing alcohol quickly desiccates the bodies of soft sucking pests like aphids, mealy bugs, and thrips. However, it can also damage plant tissues, so gardeners should use alcohol sparingly in the garden. Dab a cotton swab soaked with rubbing alcohol directly on the pests, taking care to avoid the plant. Plants with waxy leaves may tolerate a dilute alcohol spray of one-cup alcohol mixed with a quart of water.


Bug Juice Spray

Gardeners may be repulsed yet fascinated to learn that one can make a natural bug spray out of the pests themselves. No one is exactly sure why pests are their own worst enemies when applied to plants, but researchers speculate the presence of an anti-cannibalism mechanism or a chemical that inhibits insect feeding. Gather enough of the offending pests to fill at least a teaspoon, and pulverize them with the back of a spoon. Place the mashed bugs in cheesecloth, and soak in two cups of water overnight. For best results, use the bug juice within three days.

MISSISSIPPI MUD CAKE:


Melt 1 cup butter, add 1/2 cup cocoa. Stir . Pour mixture in bowl. Add: 2 cups sugar, 4 eggs. Add 1 teaspoon vanilla. Mix in 1 1/2 cups flour, dash salt. Stir in 1 1/2 cups chopped pecans Pour in greased 13× 9 pan . Bake 350° 35 minutes. Remove from oven. Sprinkle with 4 cups mini marshmallows. When cake is cool ice with : 1 1/2 sticks melted butter, 1 box powdered sugar, 1 teaspoon vanilla, 1 cup chopped pecans, 1/3 cup cocoa, 1/2 cup evaporated milk.

26 Canning Tips – Timeless Wisdom Collection / and more


26 Canning Tips – Timeless Wisdom Collection
These tips have been collected from the 1940s and 1950s, most are quite practical but one is truly a piece of old-timer wisdom that I couldn’t resist including (you’ll know which one when you see it!). I’ve also included a section “Canning Arithmetic” from that time period, it provides a guideline for what quantities to expect from several different types of fruits.
  1. When canning catsup, pour off the watery liquid on top of tomatoes after running through sieve. Your catsup will have a bright red appearance and cooking time will be cut in half.
  2. If your water bath canner does not have a rack, stretch an old rubber ring round the middle of each jar. This prevents the jars from bumping together and breaking while they are being processed.
  3. If you don’t have a rack, set extra jar rings on the bottom of the pot to keep your jars off the bottom.
  4. For foods which have been blanched for freezing, add ice cubes to the water in which they are to be chilled to hasten the chilling and retain the full flavor.
  5. To label jars of food, write on the jar while it is still hot with a bright colored crayon.
  6. Flaps cut from old unsealed envelopes can be used to label jars of fruit or preserves.
  7. When canning, select only the perfect and fresh products. Imperfect and irregular shaped fruits and vegetables may be used in jams and preserves.
  8. One tablespoon vinegar to each quart beets will help retain their color.
  9. Use soft water for blanching and precooking peas; it helps to prevent cloudiness.
  10. Make sauerkraut when the moon is new until the first quarter, and the juice will stay on until it is used.
  11. That teaspoon off your metal measuring spoons makes a handy gadget for coring fresh pears for canning, salads or desserts. Cut pears in half and then run metal teaspoon around the core. Presto, out it comes in a jiffy!
  12. When canning corn, place cob in angel food tube and cut off the corn. The corn will fall into pan.
  13. To keep pickles from shriveling, add one heaping tablespoon of alum to first salt water. (you’ll find  it below)
  14. Use only sack salt for pickles and kraut because other salt has been treated, thus will soften, discolor, and give unpleasant taste.
  15. When canning tomatoes, put onions and peppers in with them, this is grand with rice or macaroni and it is all ready to use.
  16. When canning pears, add a few drops of food coloring to a jar or two. The colored pears will provide that extra touch in holiday desserts or salads.
  17. To clean lids, put them in a pan. Cover with sweet milk, let stand till clabbered, then take out and wash. They are like new.
  18. Soak jars overnight in a solution of 1 cup vinegar to 1 gallon of water, this will remove scale and hard water film.
  19. A little lime kept on shelves where jellies or preserves are stored, will usually prevent formation of mold.
  20. A little borax sprinkled in empty jars will keep them sweet and fresh until needed again.
  21. Red fruit fades if cooked too rapidly at the start. It should be heated slowly until hot clear through, then finished quickly.
  22. Cook red fruits in aluminum or enamel to avoid their getting a bluish color. Do not use a chipped enamel kettle.
  23. After plums are washed for canning, pierce each one to prevent the skin from bursting.
  24. When using glass jars, remove only one at a time from the boiling water bath.
  25. If you’re canning more than one lot a day, mark the lot number on each label for quality control.
  26. Protect packed glass jars from the light to help protect the food from fading in color.
Canning Arithmetic
If the jars and fruit don’t come out even when you are canning, better sit down and do some figuring before you start to can. Here are some tips to help you…
  1. Apples: 1 bushel (50 pounds) cans 17 to 20 quarts
  2. Apricots: 4 baskets or crates (1 bushel) cans 20 to 25 quarts
  3. Berries: 24 quart crate cans 15 to 24 quarts
  4. Grapes: 1 bushel (48 pounds) cans 16 to 20 quarts
  5. Pears: 1 bushel (58 pounds) cans 20 to 24 quarts
  6. Peaches: 1 bushel (50 pounds) cans 18 to 20 quarts
  7. Pineapples: 15 pineapples yields 30 pints
  8. Plums: 1 bushel (56 pounds) cans 24 to 30 quarts
  9. Tomatoes: 1 bushel (56 pounds) cans 15 to 20 quarts
Common Causes Of Poor Quality Pickles: {Tip Sheet}
For Best Results Use Fresh, Good Quality Cucumbers & Ingredients When Pickling
If you plan on doing any cucumber pickling this year, here’s a handy troubleshooting tip sheet listing common problems and why they happen along with some tips I found in an old cookbook.
I’ve also included a homemade spice blend recipe at the bottom.
Too Shriveled
  1. Shriveling may result from using too strong a vinegar, sugar, or salt solution at the start of the pickling process. In making the very sweet or very sour pickles, it is best to start with a dilute solution and increase gradually to the desired strength.
  2. Overcooking or over processing may also cause shriveling.
Pickles Are Hollow
Hollowness usually results from:
  1. Poorly developed cucumbers.
  2. Holding cucumbers too long before pickling
  3. Too rapid fermentation.
  4. Too strong or too weak a brine during fermentation.
Too Soft or Slippery
This generally happens from microbial action which causes spoilage. Once a pickle becomes soft it cannot be made firm. Microbial activity may be cause by:
  1. Too little salt or acid.
  2. Cucumbers not covered with brine during fermentation period.
  3. Scum scattered throughout the brine during fermentation period.
  4. Insufficient heat treatment.
  5. A seal that is not airtight.
  6. Moldy garlic or spices.
Blossoms, if not entirely removed from the cucumbers before fermentation, may contain fungi or yeasts responsible for enzymatic softening of pickles.
Too Dark
Darkness in the finished product may be caused by:
  1. Use of ground spices.
  2. Too much spice.
  3. Iodized salt.
  4. Overcooking.
  5. Minerals in water, especially iron.
  6. Use of iron utensils.
Source: Making Pickles and Relishes At Home, Home and Garden Bulletin No. 92, U.S. Department of Agriculture (1970)
Pickles And Relishes: Points On Pickling
Handy Pickling Tips
  1. Use firm, good quality vegetables and fruits when making pickles.
  2. Some vegetables such as cucumbers require soaking in brine before covering with vinegar. This soaking helps maintain the firmness and color of the vegetables during the pickling process and also reduces bitterness. Cucumbers for gherkins should be placed in brine as soon after picking as possible. Cucumbers for dills should be placed in cold water. Hollow centers may result if cucumbers are held at room temperature for even a few hours.
  3. The proportion of 1 cup fine salt or 1 1/2 cups coarse salt to 2 quarts (10 cups) water makes a good brine. Too weak a brine will cause pickles to become soft, too strong a brine will cause them to shrivel and become tough.
  4. Be sure to use a pickling salt. Free-running salt has a chemical added to keep it from caking and is not recommended for pickling and brining.
  5. Use good quality vinegar. Both cider and blended vinegar have good flavor, but white vinegar gives better color where light colored foods such as onions and cauliflower are used. Never dilute vinegar unless the recipe calls for it.
  6. Use spices with caution. A dark color or bitter flavor may result from using too much spice or from boiling the spice too long with vinegar. Whole spices give better color and flavor than ground spices. Whole spices should be tied loosely in a cheesecloth bag, cooked with vinegar or pickle, then removed.
  7. Pickles should be stored in clean glass jars, sealers, or crocks. If kept in crocks, pickles should be well covered with vinegar solution to prevent spoilage. A plate or wooden board cut to fit inside the crock should be placed on top of the pickles and weighted down.
  8. Relishes and sauces should be packed in hot, sterilized jars and completely sealed.
Source: Cooking The Co-op Way Cookbook (1960)
Pickling Spice Blend
Combine 2 TBS each:
allspice berries
cardamom seeds
coriander seeds
whole cloves
mustard seeds
peppercorns
Add:
2 bay leaves (crumbled)
2 cinnamon sticks (broken)
2 small pieces dried ginger root (chopped)
2 small dried red chilies (crushed) or 1-2 tsp hot pepper flakes.
  1. Store in a tightly sealed container until ready to use.

Saturday, May 5, 2012

Cream Cheese and Sour Cream


Cream Cheese
1 quart homemade or store-bought plain yogurt (whole milk or low-fat, depending on your preference)
Place a clean kitchen towel or clean muslin in a colander. Place the colander in a bowl that is large enough to hold it. Add the yogurt to the lined colander and wrap the towel over the top to cover (or use a plate). Leave this to drain for about 5 hours in the refrigerator. If you want a thicker consistency, leave it longer, making sure to empty what is draining so it doesn't reach the bottom of the colander and get reabsorbed. Store your finished cream cheese in a resealable container in the fridge. Better yet, use one of your old packaged cream cheese containers to do the job!
Your cream cheese will last as long as your yogurt would, so if you used purchased yogurt rather than make it your self, check the expiration date and use that as your guide.I recommend to make the yogurt yourself since this will cut down on additional waste especially if you can get your milk in returnable glass bottles.) If you want to get fancy, you can add flavorings to your cream cheese. Try adding homemade strawberry jam for strawberry-flavored cream cheese. If you spent time dehydrating onions, then adding those (or fresh green onions) and chives from your garden will make a tasty chive-and-onion cream cheese spread.
 Sour Cream
1 cup heavy cream
1/4 cup sour cream or buttermilk (or even white vinegar will work)
Instructions
In a screw-top jar or mason jar with lid, combine the heavy cream and sour cream (or buttermilk). Shake the ingredients up a bit to thoroughly mix and let stand, covered, at room temperature for about 24 hours or until it becomes very thick. You can store your sour cream in the refrigerator in the original jar you mixed it in (or use some other resealable container) for up to one week. Make sure that your sour cream is well chilled before using.
If you want to make a lighter sour cream, substitute whole milk for 1/2 cup of the heavy cream. 

Quick Homemade Butter


Quick Homemade Butter


Equipment.


  • Mixer (or jar to shake)
  • Strainer
  • Bowl
  • Spatula

Ingredients.


  • Heavy cream (preferably fresh/Raw)

Steps.


1.  Leave the cream out for a bit so that it warms to 50F or so.
2.  Pour the cream into the mixer with a whisk attachment.  Put a cover over the mixer, so you don’t splatter cream all over your kitchen:
Alternatively, you can pour the cream into a jar you can shake.  (This will take longer, but your arms will get a good workout, and you can make it a family project.) 
3.  Mix on medium-high for 5-7 minutes.  For once in your life, you get to over-whip cream!  Here’s what you’ll see:When the butter has separated from the liquid, you’re done mixing
4.  Strain the butter into a bowl, making sure all the liquid runs out.  Then set aside the liquid.  (That liquid is homemade, uberfresh buttermilk!)
5.  Rinse the butter with water to remove any excess liquid.6.  Knead the butter with a spatula to bring together the curds.  This doesn’t take long – a minute or two.  If you want to salt your butter, now is a good time.  (We prefer to have unsalted butter, which gives us more salt control when cooking.)Save the butter in a sealed container in the fridge, and use the fresh buttermilk for pancakes or homemade biscuits!


Sunday, April 29, 2012

Kiss Vicks Goodbye – DIY Chest Rub


Kiss Vicks Goodbye – DIY Chest Rub

When we are sick, many of us reach for the Vicks Vapo Rub.  I often have, hoping it would ease my congestion.  Over the past few years I have grown more wary of using any petroleum-based products, and have sought more natural means of dealing with colds and congestion.
I was going to save this post for the winter months, but my daughter just came down with a summer cold and I thought some of you might too. (But hopefully not!)
With the surge in skin-based medicines such as the birth-control patch and the nicotine patch, it has become increasingly obvious how much the skin actually absorbs.  What we put on our bodies is just as important as what we put in our bodies!
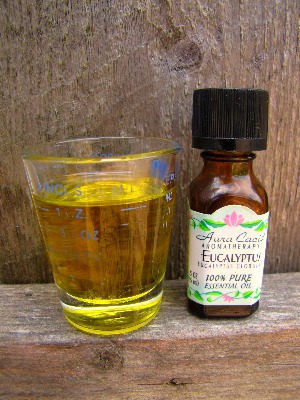
There are many natural products available at the health food store, but they can be expensive.  Making your own chest rub could not be easier.  All you need is a little olive or almond oil and some essential oils.
Here is the very un-complicated process:
Pour 2 ounces of almond or olive oil into a small bowl or cup.
Add 20 drops of essential oil – choose eucalyptus, hyssop, thyme, peppermint,  basil, or rosemary.
This recipe comes from An Encyclopedia of Natural Healing for Children and Infants, by Mary Bove, N.D. page 286.
I have personally only used  eucalyptus so far and often make just half the recipe (1 ounce oil, 10 drops eucalyptus).
Chest rubs are useful because they help to relax the chest muscles by increasing circulation.  The aroma is also soothing and aids the opening of respiratory passages.
Bove mentions that the recommended essential oils (mentioned above)“are very volatile and therefore penetrate the skin easily, stimulate blood flow, relax the muscles, and deliver medication to the local area.  They can be especially effective with spastic, tight coughs.” (page 99, An Encyclopedia of Natural Healing for Children and Infants )
With younger children you may wish to start with less than 10 drops per ounce of oil and see how they do.  Do not apply essential oils directly to the skin, and never ingest.
This post is being shared at Simple Lives Thursday at GNOWFGLINS.

Sunday, April 22, 2012

Household Hints from Northern Cookbook 1967 Eleanor A. Ellis


  • Household Hints from Northern Cookbook 1967 Eleanor A. Ellis
    By Rosemary Pentland in Back to the Basics! ·  Edit Doc
    If cheese has started to mold, trim the mold, then wrap in a cloth dipped in vinegar.

    If mold appears on ham or bacon, wipe off with a cloth dampened with vinegar.

    Fresh potatoes may be frozen for winter use. Put into boiling water salted without peeling and cook until tender, then peel if you like. Or bake.

    To keep butter from becoming rancid, store it well covered in a cool dark place.

    Soak bacon slices in cold water for 5 minutes to reduce the salt, drain, and pat dry.

    Break sprouts off stored fresh potatoes as soon as they appear, to prevent the potatoes from becoming soft.

    Soften brown sugar by storing in an air tight container with a slice of fresh bread.

    Fresh eggs will keep longer if dipped in thin warmed mineral oil, drained, then stored in a cool place.

    Soften hard butter for sandwiches by inverting a warmed soup bowl over it.

    When you cook eggs in the shell, a teaspoon of salt in the water prevents cracking.

    Wash windows with 1/4cup vinegar in 4 cups warm water.

    Add a spoon of salt to your last rinse water and your laundry won't freeze to the clothesline.

    Loosen doors or windows that are frozen shut by pouring heavily salted water around the edges.

    Hard soap rubbed on drawer runners will help prevent sticking.

    To remove a water ring from furniture, rub with a mixture of table salt and light oil, or cigarette ashes, and butter. Wax, and polish.

    To thaw frozen pipes, wrap pipes with cloths and pour boiling water on the cloth.

    Remove the adhesive tape marks with alcohol or nail polish remover.

    A paste of baking soda and water will take the sting out of a burn, and the burn out of a sting. A mud paste also eases insect bites. (as an aside, i have been told this by my Amish ladies in my community, ~Rosemary)

    Remove rust stains from a sink or tub with kerosene.

    Keep baking soda near the stove, good for putting out fires.

    Stick your sewing needles in a bar of soap in  your sewing kit. They will slide easily, and won't rust.

    The flavour of safe but unpalatable water may be improved by adding charcoal from a campfire and allowing it to stand overnight.

    A sheet of clear wrap, or a pane of glass helps keep a recipe book clean.

    When making jelly, 1 tablespoon epsom salts to 5 pounds of fruitt will take the place of commercial pectin.

    Freshen stale walnuts by pouring boiling water over them.

    Revive tired peanuts by baking them in a 275 F oven for one hour. Leave the shells on if you wish.

    To render animal fat, cut the suet and surface fat into cubes, heat it slowly in a heavy covered kettle, then strain it. Bring the liquid fat to a boil, reduce the heat, and let simmer for ten minutes to sterilize it. Pour fat into hot, sterilized containers seal, and store in a cool place. Rendered bear fat makes excellent pastry.

    Use baking soda in the water that you wipe the inside of your fridge with when cleaning it.